Google Analytics 생성
Redirecting...
analytics.google.com
보고 시간대와 통화를 본인 국가로 설정한다.
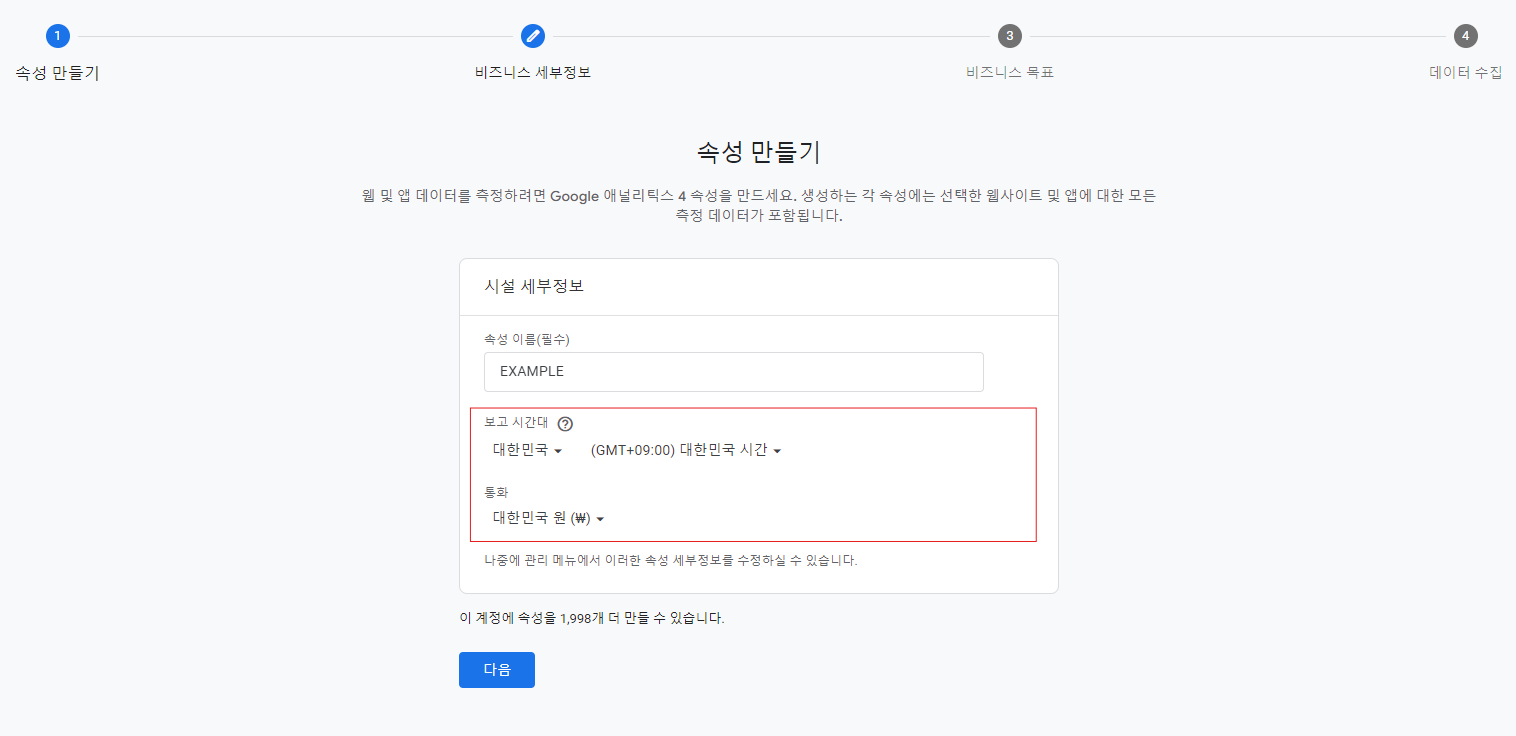
생성 이후 보고서 검토에 나올 메뉴들을 선택하는 것으로 Get baseline reports 선택해도 무관하다.

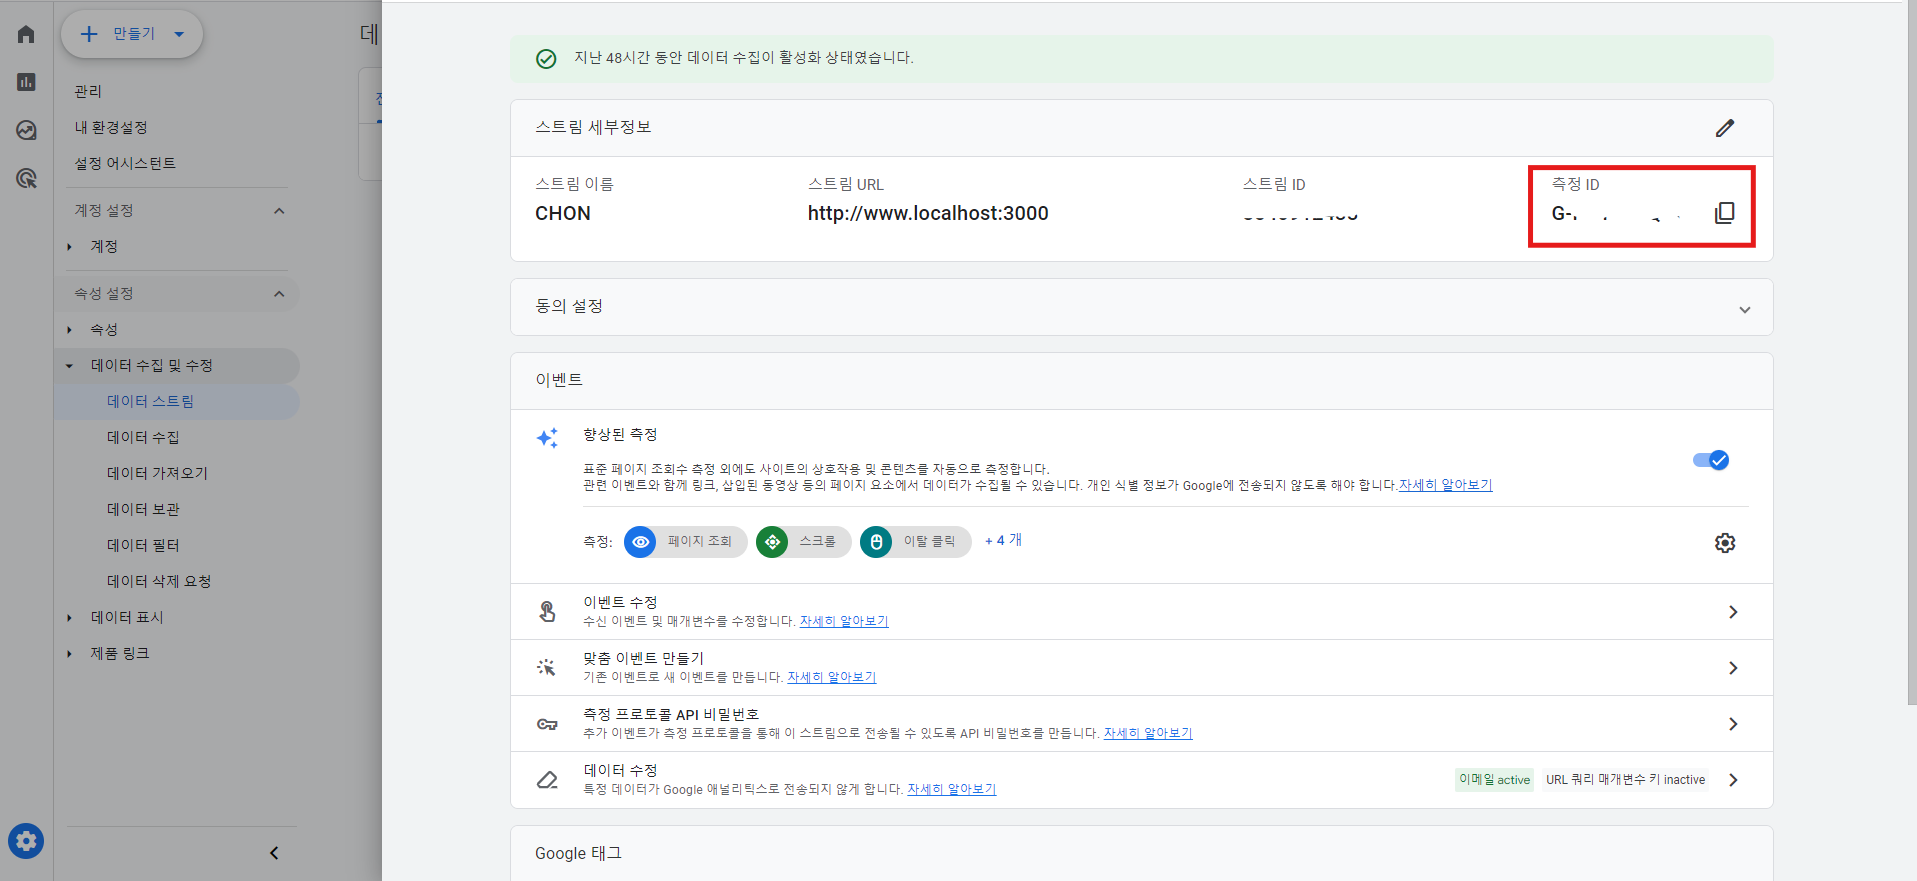
PropertyID 획득
이후 runReport API 호출 시 필요한 ID로 ENV 환경 변수에 저장

NextJS Google Analytics 설정
Next/third-parties 설치
# ME : "@next/third-parties": "^14.2.5"
npm i @next/third-parties
GoogleAnalytics 설정
// 메인 Root Layout
import { GoogleAnalytics } from '@next/third-parties/google';

export default function RootLayout({children}: Readonly<{children: React.ReactNode;}>) {
  return (
    <html lang="en">
      <body className={inter.className}>
        {children}
        {process.env.NEXT_PUBLIC_GAID ? (
          <GoogleAnalytics gaId={process.env.NEXT_PUBLIC_GAID} />
        ) : null}
      </body>
    </html>
  );
}
GAID 획득

Google OAuth 2.0 생성
Google Analytics API 호출 시 OAuth Access Token이 없으면 API에서 401 에러가 발생하기 때문에 미리 발급 받도록 한다.
Google 클라우드 플랫폼
로그인 Google 클라우드 플랫폼으로 이동
accounts.google.com
1. Google Cloud 프로젝트 생성

2. API 라이브러리 메뉴에서 Google Analytics Data 검색 후 라이브러리 등록


3. OAuth 클라이언트 ID 만들기


4. ClientID, ClientSecret 획득 후 ENV 환경변수에 2가지를 입력하자.


Access Token, Refresh Token 획득
OAuth 2.0 Playground
Request Body Manual entry Enter the data that will be added to the body of the request: File You may choose to send a file as part of the request. When both a file and manual content are provided both will be sent using a multipart request. You may send fi
developers.google.com
1. 페이지 오른쪽 위의 설정 클릭 후 [Use your own OAuth credentials] 체크하고 위 (4)번에서 얻은 ClientID, ClientSecret 입력 후 close하면 저장된다.

2. STEP 1 : 사용할 API 선택 (Analytics Reporting API v4, Google Analytics API v3) 그림과 같이 3개 체크


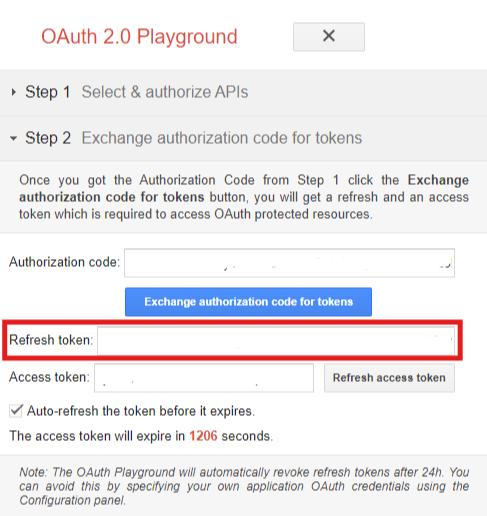
3. STEP 2 : STEP 1에서 Authorize APIs 버튼을 클릭 후 STEP 2로 넘어오면 TOKEN이 생성된다. ENV 환경 변수에 Resfresh Token을 입력하자.
[400 Error] Authorize APIs Button Click Error
토큰이 만들어지지 않고 Google 400 에러 페이지가 나타난다면 승인된 리디렉션 URI에 oauthplayground URL을 설정하면 된다. ( https://developers.google.com/oauthplayground )

OAuth 플레이그라운드 | Google Ads API | Google for Developers
이 페이지는 Cloud Translation API를 통해 번역되었습니다. 의견 보내기 OAuth 플레이그라운드 컬렉션을 사용해 정리하기 내 환경설정을 기준으로 콘텐츠를 저장하고 분류하세요. OAuth2 사용자 인증 정
developers.google.com
API Request Body 생성
https://ga-dev-tools.google/ga4/query-explorer/
ga-dev-tools.google
1. 해당 페이지에서 Google Analytics에서 생성한 계정과 속성을 설정하고 파라미터들을 입력한다.

아래는 Metrics, Dimensions에 설정에 대한 문서로 원하는 목록을 가져오기 위해 검색 후 설정하면 된다.
API 측정기준 및 측정항목 | Google Analytics | Google for Developers
이 페이지는 Cloud Translation API를 통해 번역되었습니다. 의견 보내기 API 측정기준 및 측정항목 컬렉션을 사용해 정리하기 내 환경설정을 기준으로 콘텐츠를 저장하고 분류하세요. Data API 핵심 보
developers.google.com
2. 검색 결과가 없어도 빈 결과라도 보여주기 위해 keep empty rows를 체크하고 Request Body를 만들고 복사한다.
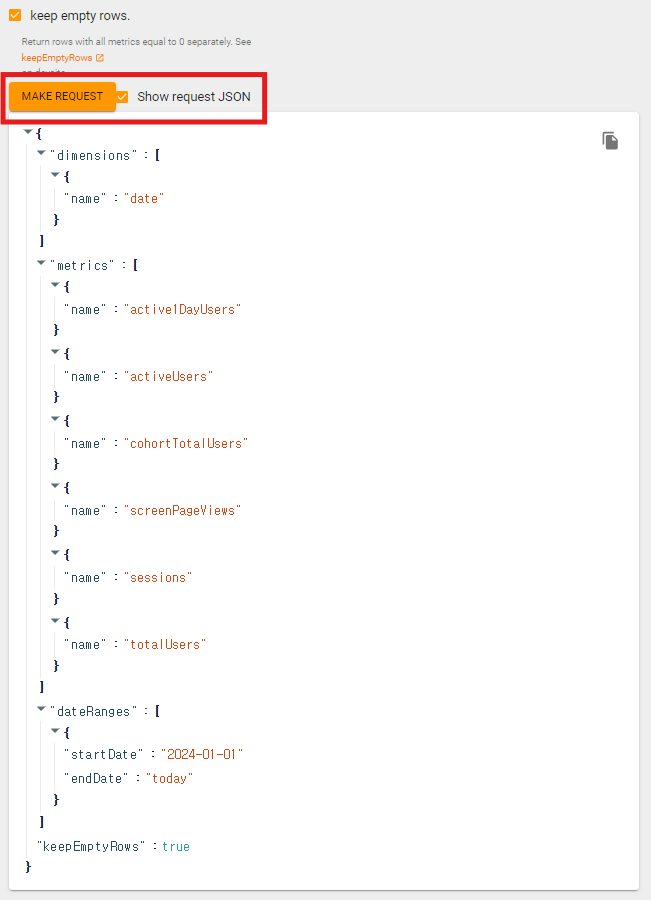
Request Body 생성 시 어떤 데이터를 보여주는지 확인도 가능하다.

NEXT JS Google Analytics API 호출
기존에 ENV 환경변수에 저장한 ClientID, ClientSecret, RefreshToken, PropertyID 넣어주고 runReport API의 Body에는 만든 Request Body를 붙여넣는다.
"use server"
const Header = async () => {
  const oauth = await fetch('<https://accounts.google.com/o/oauth2/token>', {
    method: 'POST',
    body: JSON.stringify({
      client_id: process.env.NEXT_PUBLIC_CLIENT_ID,
      client_secret: process.env.NEXT_PUBLIC_CLIENT_SECRET,
      refresh_token: process.env.NEXT_PUBLIC_REFRESH_TOKEN,
      grant_type: 'refresh_token',
    }),
  });

  const oauthJson = await oauth.json();

  const res = await fetch(
    `https://analyticsdata.googleapis.com/v1beta/properties/${process.env.NEXT_PUBLIC_PROPERTY_ID}:runReport`,
    {
      method: 'POST',
      headers: {
        Authorization: `Bearer ${oauthJson.access_token}`,
      },
      body: JSON.stringify({
	      "dimensions":[{"name":"date"}],
	      "metrics":[
		      {"name":"active1DayUsers"},
		      {"name":"activeUsers"},
		      {"name":"cohortTotalUsers"},
		      {"name":"screenPageViews"},
		      {"name":"sessions"},
		      {"name":"totalUsers"}
		    ],
		    "dateRanges":[{"startDate":"2024-01-01","endDate":"today"}],
		    "keepEmptyRows":true
		  }),
    },
  );

  const resJson = await res.json();

  return (<header className="flex items-center"></header>);
};

export default Header;
CORS ERROR
200 ok cors error 발생 시 “use server”를 사용하여 server component에서 사용하거나 App Route를 이용하여 GET 방식으로 호출하도록 한다.
결과
위를 모두 이행하면 ClientID, ClientSecret, Refresh Token 으로 매번 새 Access Token를 발급받고 runReport API를 실행하여 Google Analytics에서 원하는 데이터를 받아올 수 있게 된다.

도움
필자는 아래 블로그의 도움을 받았으며 해당 페이지 내용에서
- NextJS + Google Analytics 연동
- 400 Google Error Page
- Cors Error
등 추가했습니다.
[React.js] GA4(Google Analytics) - ②API 호출하기
React에서 GA4(Google Analytics) 보고서 API를 다루는 방법을 알아보고자 한다.
velog.io
'NEXT' 카테고리의 다른 글
| AWS S3 Access Denied CopyObjectCommand (0) | 2024.10.18 |
|---|---|
| Only plain objects, and a few built-ins, can be passed to Server Actions. (0) | 2024.10.08 |
| Parallel Routes Modal Difficult Error (0) | 2024.07.25 |
| NextJs Next-auth getSession() 로그인 정보 확인 (0) | 2024.07.23 |
| NEXT 14 NEXT-AUTH 5 middleware.ts not working (0) | 2024.07.11 |